My clients started asking for the blunt straight lob so much, I got tired of hearing myself explain it. Then I realized, I never get tired of cutting it. Medium-length straight hair just does something to a face that longer hair can’t, it sharpens everything, makes you look like you made a decision.
I keep coming back to a few favorites, the sleek center part with real shine, the curtain bang that splits just right, the wispy ends that look accidental but aren’t. If you have been sitting on making a change, these are the styles I actually stand behind.
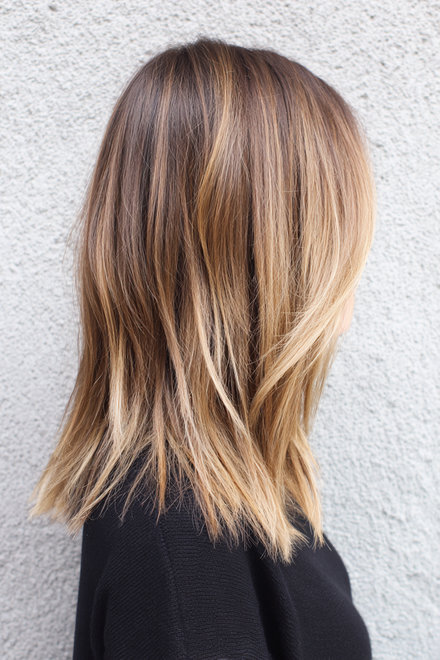
1. The Blunt Lob That Commands a Room
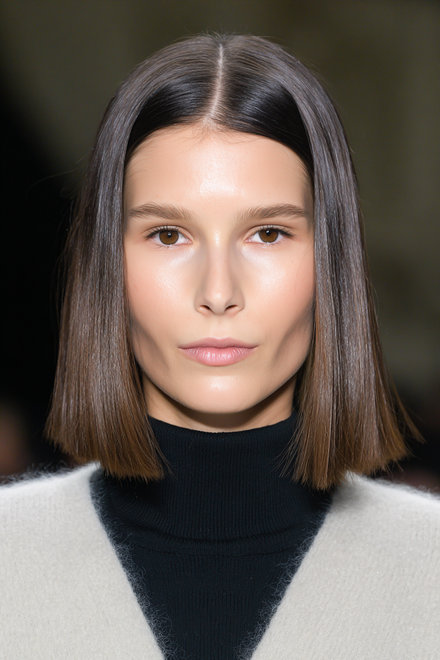
I cut this one more than almost anything else in my chair. You take the hair to about collarbone length and cut it totally straight across. No softness in the ends at all, just a clean sharp line. I always tell people to ask for a dry cut here because wet hair tricks you.
After cutting, I run a flat iron slowly from root to tip on every section. A little silicone serum rubbed between the palms first, then smoothed down the hair, that step is what gives you the glassy look. People always ask me what makes it look so thick. It’s the blunt edge catching light all at the same level. This one works with bold brows and simple makeup. Honestly, less is more with this style.
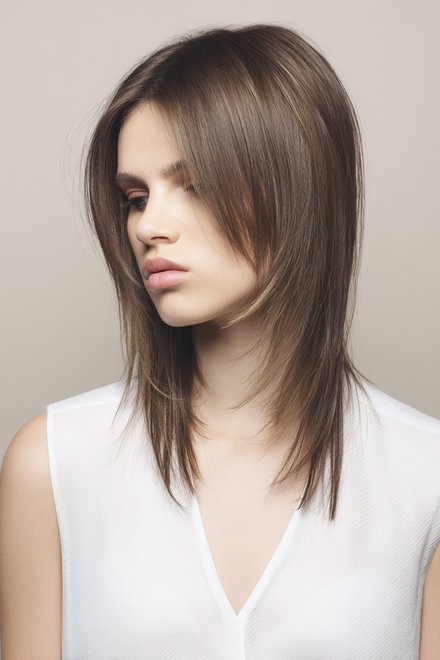
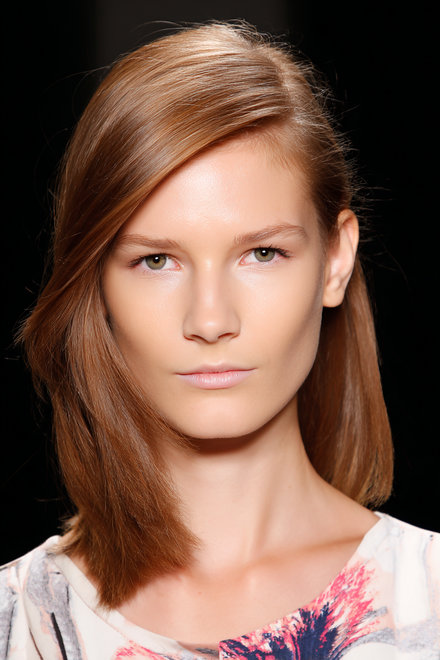
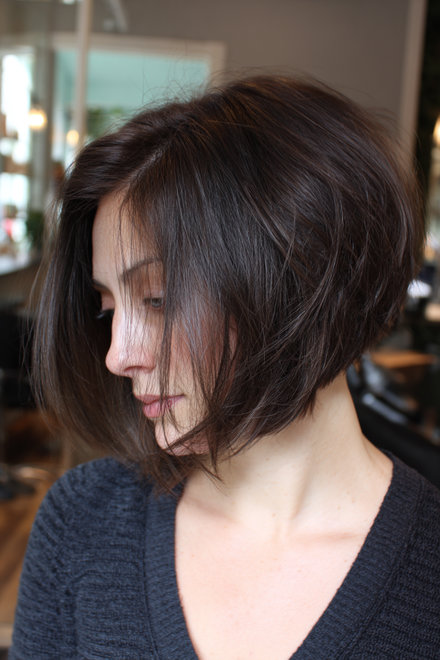
2. Face-Framing Layers That Don’t Disrupt the Straight Silhouette
So many people are scared of layers when they want straight hair. I get it, but hear me out. I only cut layers in the very front sections, starting around cheekbone height and blending down past the chin. Everything at the back stays one solid length, no touching it. When I blow dry, I point the nozzle downward the whole time and use a paddle brush.
Then I just press a flat iron through those front pieces. The rest I leave alone. Those front layers catch the light in a slightly different way than the back, so you get this quiet little bit of movement. It grows out really well too, which I always mention because nobody wants to be back in my chair every six weeks for a trim.
3. The Curtain Bang with Sleek Mid-Length Hair
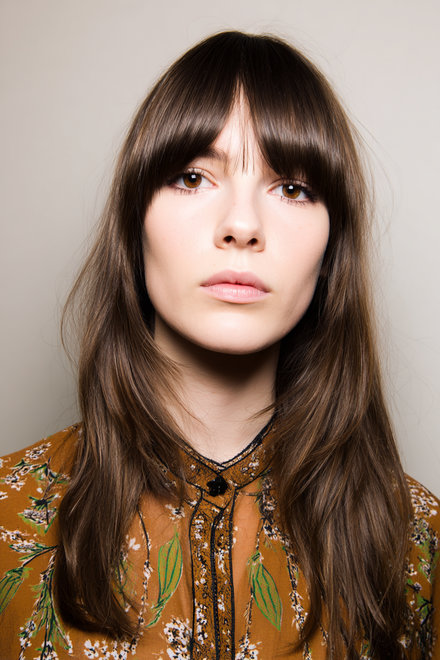
Curtain bangs on straight hair look amazing and I say that from years of doing them. They split right down the middle and sweep past the brows on each side. Your hair below the bangs needs to be completely straight for this to really hit the way it should. I dry the bangs with a tiny round brush, pushing them outward to each side.
Then I go over the tips with a flat iron to lock in that sweep direction. Everything below gets the full flat iron treatment with titanium plates because I want it sharp. The contrast between the soft curved bangs and the sleek straight lengths below is what makes it look so good. A small amount of light-hold spray on the bangs before you leave the house keeps them from splitting apart by noon.
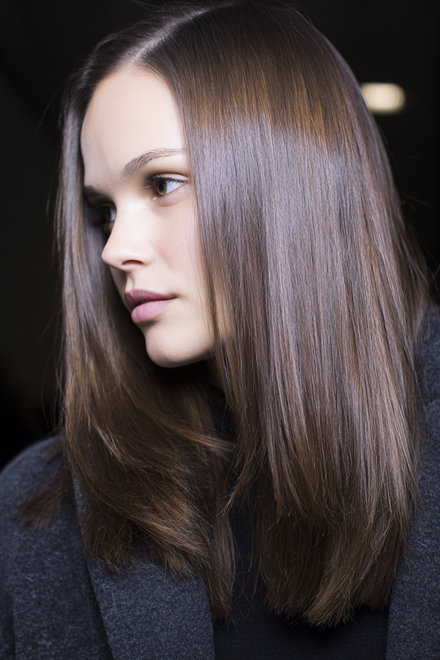
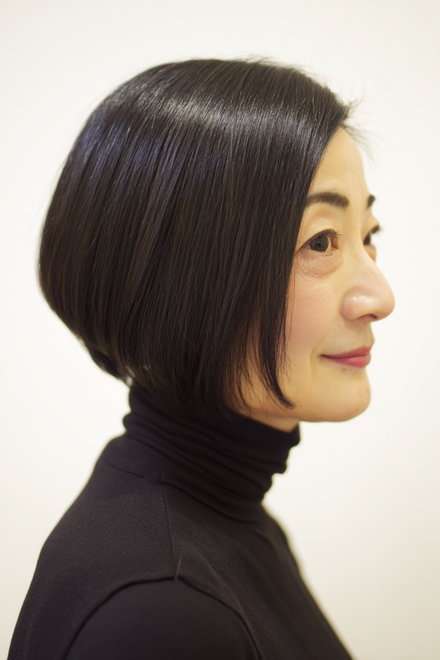
4. Sleek Center-Part with a Deep Glossy Finish
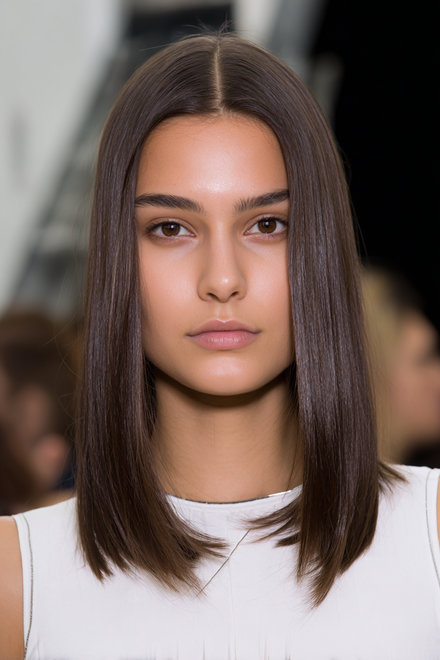
A center part on straight mid-length hair never fails me. I use a rattail comb and draw the line carefully from the hairline all the way back to the crown. Before any heat at all, I work an oil-based smoothing product through the hair because that’s what creates the shine later. Flat ironing slowly is the secret here, slow passes from the root down, not rushing.
Argan oil is my go-to but camellia oil works just as well. Once everything is flat and shiny, I tell my clients to please not touch the part line. Even one finger running across it softens everything and you lose that precision. This is one of those styles that photographs beautifully in natural light. You don’t need accessories, the hair is the accessory.
5. The Barely-There Wave Pressed into Straightness
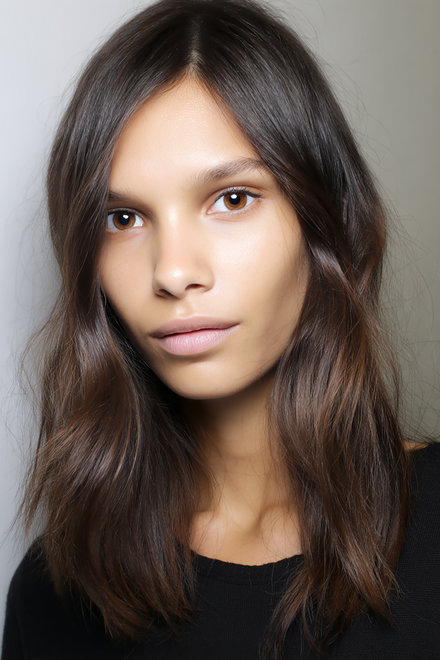
This one is for people with wavy hair who want straight but not flat. I don’t try to fight the wave completely, I just calm it down. Floating plate flat irons are what I always recommend because they self-adjust the pressure and stop you getting those harsh bends in the hair. I work in one-inch sections at a medium heat setting, not high, and I glide slowly.
What you end up with is straight ends but the mid-lengths keep just a little bit of life in them. It still reads as straight to everyone looking at you. I also love this method because it means fewer passes and less damage over time. A flexible serum at the end rather than a stiff spray keeps everything looking real instead of overdone.
6. The Wispy Ends Look That Feels Deliberately Undone
I am a huge fan of what a razor or point-cut finish does to straight hair. Only the last couple of inches of the hair get texturized, nothing above that. This creates ends that look feathered and light instead of solid and heavy. On fine hair it adds so much dimension because light hits all those tiny points differently. On thick hair it removes that heaviness you can sometimes see dragging the ends down.
At home between salon visits, I show clients how to lightly backcomb just the very tips after straightening, then seal with a quick mist of light spray. Nobody ever guesses what the trick is. They just say the hair looks full and soft. A razor cut at the ends is one of those small things that makes a massive difference to the finished look.
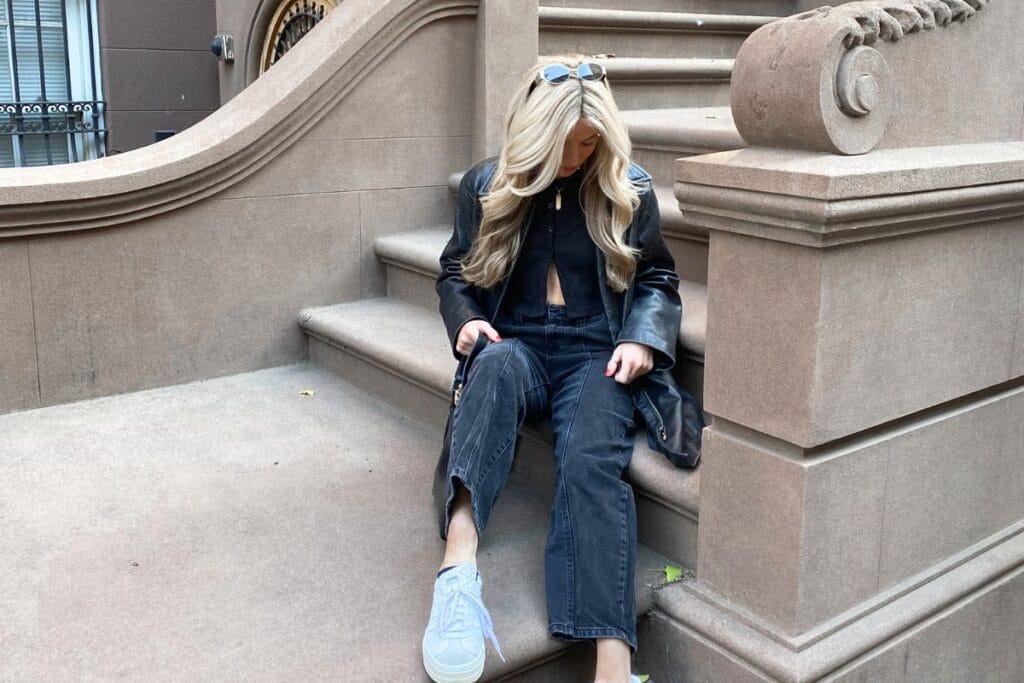
7. Polished Side-Swept Style with a Low Side Part
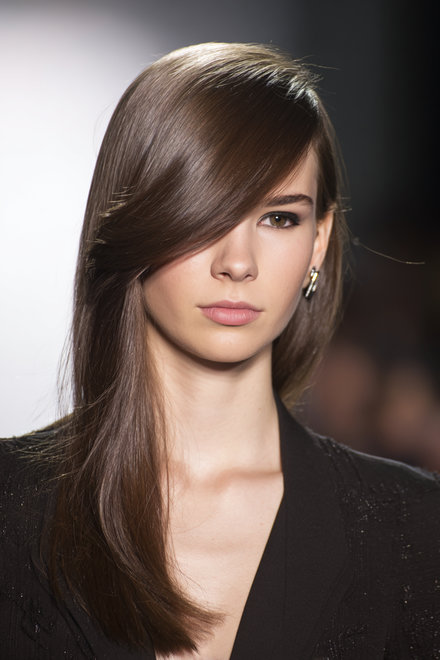
Side parts change the whole vibe of a straight mid-length style and I love recommending them. I carve the part close to the temple with a fine-tooth comb, not too far back. Then I blow dry everything toward the heavier side, keeping the nozzle pointed down. The flat iron goes through after to make everything smooth.
Something interesting happens with the weight of hair all swept to one side, the ends create a soft natural bend that you never planned. Tuck the lighter side behind the ear or use one bobby pin and that’s it. Statement earrings look incredible with this because the lighter side of the neck is totally exposed. A centered style keeps both sides hidden but this one shows your jaw and neck off.
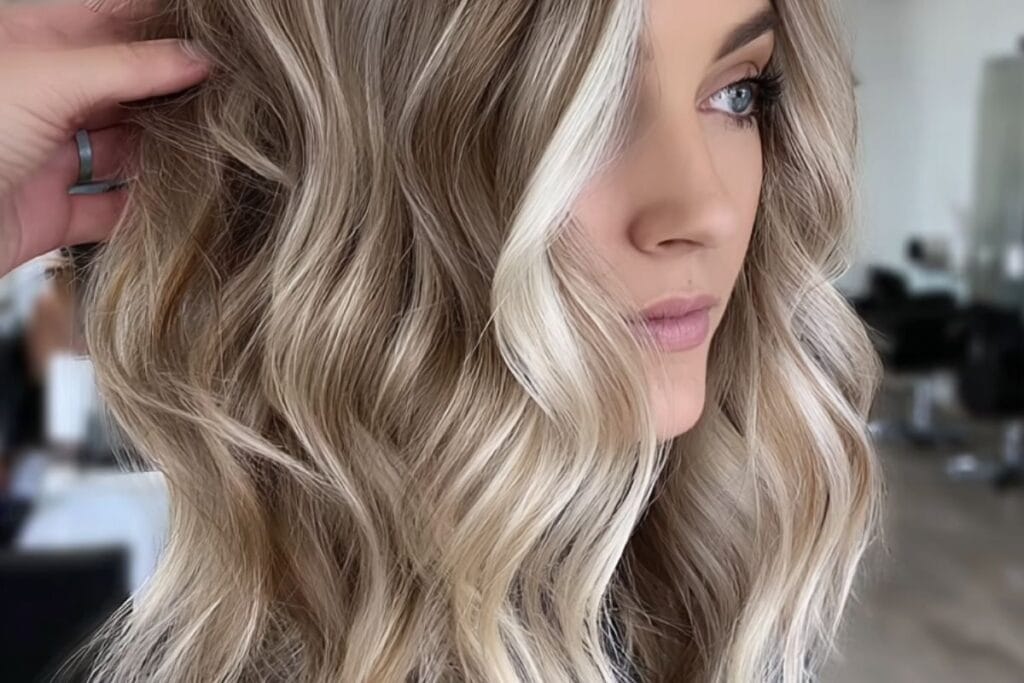
8. Straight Hair with Bold Money Piece Highlights
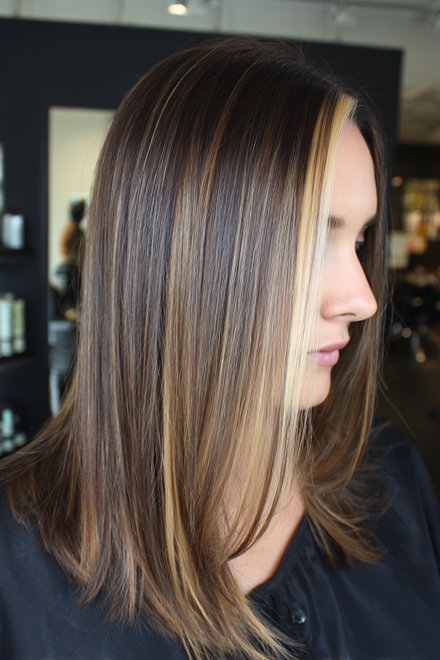
I have put money piece highlights on so many clients and it changes everything about how the face looks. These are bright face-framing pieces placed only at the very front of the hair. Straight hair is honestly the best base for this because there are no waves or curls breaking up the color. The lightened sections glow right next to the darker sections behind them. You can go one shade lighter for something soft, or you can go platinum next to deep brown for something that really stops people.
Please always use a heat protectant on highlighted hair before flat ironing because lightened hair is porous and burns faster than untreated hair. I also ask clients to do a deep conditioner once a week because the highlighted pieces need extra moisture to stay vibrant between appointments.
9. The Ear Tuck with a Structured Blowout
This is one of those styles that looks too simple to mention but the details are everything. You blow dry the hair completely smooth with a paddle brush, then tuck one side cleanly behind the ear. The tucked side sits flat against the head and the other side swings loose. What makes or breaks it is how tight the tuck is. I use a tiny amount of pomade on the fingertips and press the hair flat right behind the ear so it doesn’t spring back out.
The loose side needs a little extra volume blown into it to balance the flatness on the other side. It sounds like nothing but in person it looks sharp and considered. This one works especially well on asymmetrical face shapes because it draws the eye to one side intentionally. I recommend it constantly for people who say they don’t know how to style their hair.
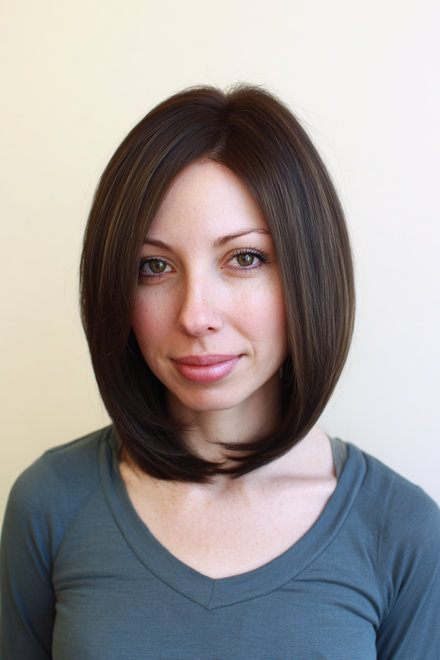
10. Neck-Grazing Straight Bob with Inward Curl

This bob sits right at that collarbone to shoulder zone and I think it’s one of the most wearable lengths I ever cut. The ends curl slightly inward toward the face and neck instead of sitting dead flat. I create that with a flat iron and a small wrist rotation toward the face in the last two inches of each section. The heat locks the direction in and you get a soft C-shape that frames the jaw.
The main body of the hair above needs to be completely straight so the curl at the ends stands out. Light-hold finishing spray keeps the curl sitting right without going stiff. On thick hair the inward curve helps control the ends. On fine hair it creates the illusion of more body at the bottom. This is a quick one to refresh on days two and three.
11. The Collarbone Cut with Internal Layers
This is my answer for people who want something different but are too nervous to go short. The outside perimeter stays at collarbone length, completely solid, no graduation. All the work happens inside, with long internal layers that remove weight from the mid-lengths without ever touching the outline shape. From the outside it looks like a clean one-length cut.
Run your fingers through it and you feel the lightness. On thick hair this is genuinely life changing because the bulk that usually makes straight hair feel heavy just disappears. I carve the internal layers freehand rather than using a guide because every head of hair carries weight differently. The result moves more than a blunt cut but looks more polished than a traditional layered cut. Nobody can ever quite put their finger on why it looks so good.
12. The Blown-Out Straight Look with Root Volume

Not all straight hair has to sit flat and this blowout proves it. I want straight lengths but big lifted roots and you can have both at the same time. Volumizing mousse at the roots before anything else, that step is non-negotiable. I flip the head upside down for the first couple of minutes of blow drying to build lift at the crown. Then I work section by section with a round brush, drying each piece pointing downward for the straightness but keeping tension at the root to hold the lift.
The flat iron only touches from mid-length to the ends, never the roots. Pressing the iron against the roots would cancel out all that volume you just built. A flexible hold spray locks the lift in without making it crunchy. This approach makes fine hair look way thicker than it actually is.
13. Shoulder-Length Straight Hair with Textured Underlayer
I started suggesting this technique a few years ago and it changed how many of my clients feel about their hair. The top layer gets flat ironed completely smooth. The underneath layers get left alone to do whatever they naturally do. From the outside the hair reads as straight because the smooth top layer covers everything. But the texture underneath props the style up from below so it doesn’t collapse flat by lunchtime.
I only apply heat from the temples upward and let the under-layers air dry. It saves time in the morning and it also means less heat damage overall which I always feel good about. As the day moves on the underlayer gently pushes the top up and gives the style a little natural evolution. If your hair has some wave in certain spots this technique uses that instead of fighting it.
14. The Grown-Out Fringe Cut with a Heavy Curtain
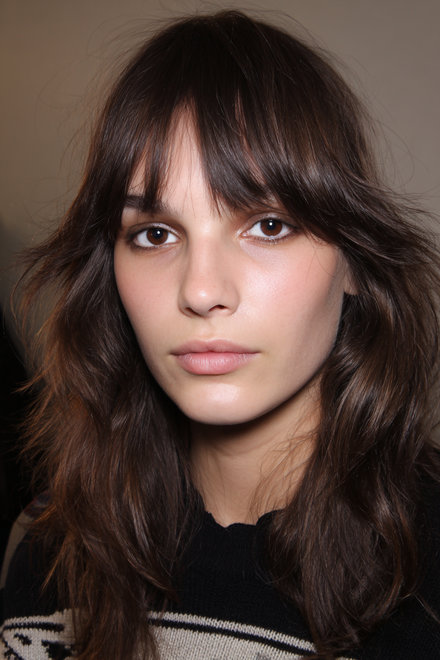
This is not a bang trim, it is a whole cut built around a heavy curtain fringe as the main feature. I cut the fringe long, past the brows and toward the cheekbones, and make it thick rather than wispy. Then I build the rest of the cut to support it, with lengths that sit at the shoulder and subtle layers that pull the eye toward the face.
On straight hair the fringe lies flat and heavy which is exactly what this cut needs. It frames the face in a way that shorter bangs never do because the length creates a soft enclosed feeling around the features. I started doing more of these after clients kept bringing me references from French and Korean street style. The maintenance is easier than a classic fringe too because the length gives you more room for the grow-out phase.
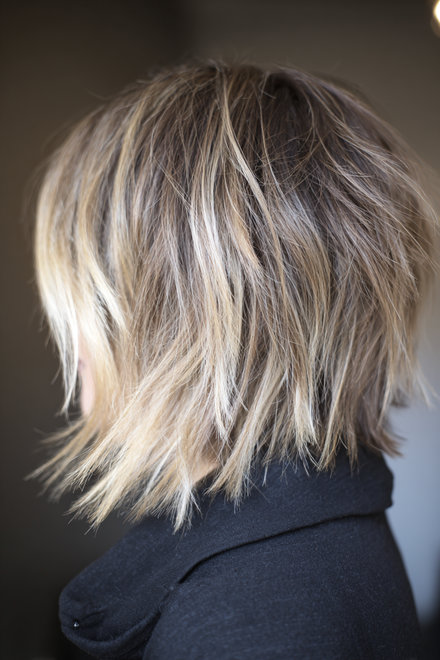
15. Straight Shag with Curtain Bangs and Mid-Length Layers
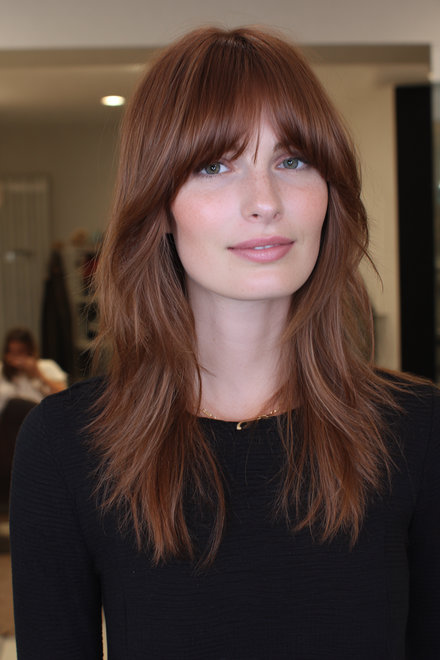
The modern shag cut done on straight hair is something I really enjoy doing. It takes the classic layered shag concept but instead of needing wave to make it work, the layers just hang straight and the different lengths create the shape. Layers start at the crown and fall at different lengths all the way down, all pressed straight. Curtain bangs are part of this look too, swept outward from a center part.
A paddle brush during blow drying keeps everything smooth without flattening the layers against each other. Then the flat iron closes the cuticle on each section. Because each layer sits at a different length, light hits them all at different angles and you see this nice multi-level dimension in the hair. Glossing spray at the end brings all of that out more. Medium to thick hair handles this cut best.
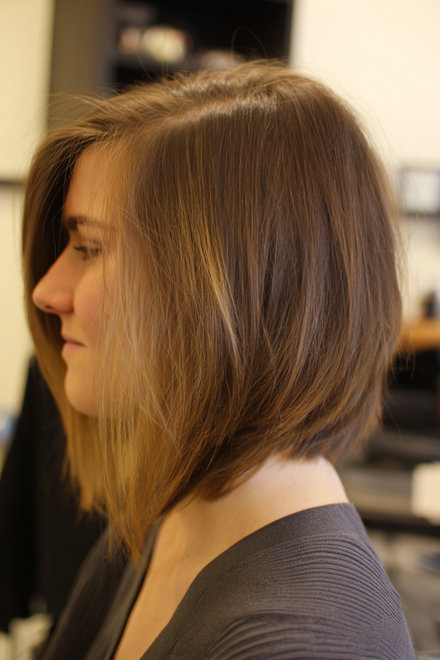
16. The Layered Lob with a Rounded Silhouette
Most lobs are cut straight across but I love what happens when you round the back slightly. The back sits a little shorter than the sides and front which creates a curved silhouette that hugs the head rather than hanging flat. On straight hair this roundness is very clean and geometric looking. I use a combination of point cutting and slicing to soften the layers so they blend rather than stack.
The front pieces stay the longest and frame the face. When the hair is pressed straight the layers catch light at different heights all the way around the head and it looks incredibly full. This shape also grows out beautifully which is something I always think about when I design a cut. Clients with fine hair especially love this one because the rounded shape creates the illusion of much more volume than they actually have.
17. The Italian Bob
I have been doing more Italian bobs this year than anything else and I do not see that slowing down. It sits just below the chin and the ends are cut with a slight underbevel so they curve naturally toward the face without needing a flat iron to coax them. The layers inside are minimal, just enough to remove bulk without creating visible steps.
On straight hair the underbevel is everything because it gives the cut movement and personality that a flat blunt line does not have. I cut this with the hair slightly damp rather than wet or dry because that gives me the most accurate picture of where the natural fall is. The result looks like effortless expensive hair and it genuinely is not that hard to maintain at home. A round brush during blow drying is all you need to activate the shape every morning.
18. The Sharp Ear-Length Bob Worn Poker Straight
Cutting hair to ear length and pressing it completely straight is a bold move and I love when clients go for it. Everything gets exposed, the neck, the jaw, the ears. There is nowhere for the hair to hide which means the cut itself has to be right. I cut the ends totally blunt and level and then flat iron every single section until it lies completely against the head.
Shine drops on each panel before the final pass creates this almost lacquered effect that is so striking. This bob photographs amazingly and looks even better in person. An architectural earring or a simple gold cuff on the exposed ear ties the whole thing together. Simple and strong is what I always say about this one. It works on most face shapes when the cut line is placed correctly.
19. The Textured Bob with Disconnected Layers
This is not your standard bob and that is exactly why I love it. I disconnect the layers intentionally, meaning there is a visible gap between the top layers and the underneath sections rather than a smooth blend. On straight hair this disconnection creates a lot of visual dimension because you can see multiple layers of different lengths sitting separately.
The top layer is shorter and sits closer to the head. The underneath layers peek out below it. I use a razor to cut the top layers so the edges are soft rather than blunt. The contrast between the soft top and the slightly heavier perimeter underneath gives the whole cut structure and movement at the same time. This is a cut for people who want something they cannot quite explain but know looks different from everyone else in the room.
20. The K-Pop Straight Cut
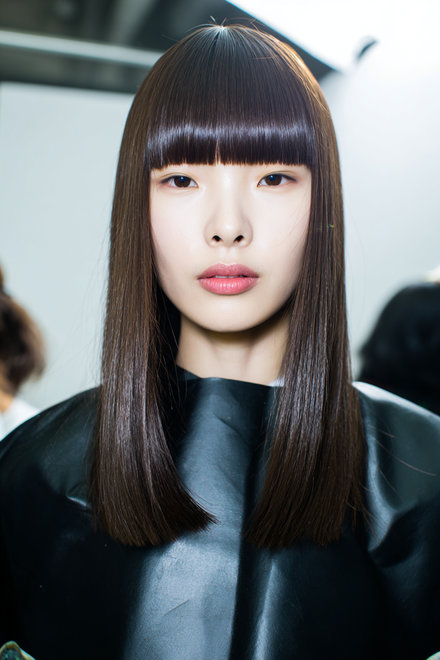
Korean pop and Korean beauty have pushed a very specific kind of straight cut into the mainstream and I have been doing my version of it constantly. It is a blunt collarbone length cut with extremely straight across bangs that hit right at the brow bone. The whole thing is one weight, no layers at all, just a perfectly flat curtain of hair from the bangs to the ends.
On naturally straight fine hair this cut is extraordinary because the lack of layers keeps all the weight together and the hair looks incredibly dense. I press every section absolutely flat with a ceramic iron and then apply a gloss serum to the whole surface. The bangs need to be cut very precisely because on straight hair a crooked fringe line is immediately obvious. This cut photographs like nothing else. It is graphic, clean, and completely striking.